Nowadays most IT admins will get an email if their website monitoring solution detects a health issue or a website down. Maybe your entire team gets an email. But how likely are you to check your inbox every minute. And don’t you want share on-call duty across your team members? You simply don’t want to have everybody on firefighter duty around the clock.
Your website down email is likely overlooked among spam and low priority mails. And finally, how do you know that somebody else of your team members took ownership of the issue. How do you avoid waste work or following up on your team. Transparency about response and resolution would be pretty awesome. In short – how do you ensure a timely and effective response in such case?
SIGNL4 is the perfect lightweight solution for reliable website down notifications
If you find yourself and your team reflected in this picture, SIGNL4 is your solution. SIGNL4 sends critical and relevant alerts to your mobile phone via push. Only people who are checked for duty receive website down notifications. Alert notifications in SIGNL4 are persistent and require an active confirmation (simple tap in the app). If an alert remains unconfirmed, operations staff on duty is paged again and again until one of the team members does confirm the alert. And this acknowledgement is visible throughout the entire team in real-time along with any annotation users make. Push notifications can be configured to have a custom notification sound so they cannot be confused with WhatsApp or Facebook notifications. The visual display capabilities of SIGNL4 provide a much faster recognition and categorization of your alerts.
How to get started
SIGNL4 works with any website availability monitoring tool which can either send an email or call a webhook upon a health issue detection. In this example we are going to use Azure Application Insights for website monitoring.
To get started download the SIGNL4 app and sign up to create your team. Invite other “fire fighters”, i.e. your team peers, so that you don’t remain the only one.
Next, let’s set up Application Insights. We’ll create a simple availability test for your site. In case you have it setup already, skip unnecessary steps and proceed to step 3 directly. You can read more on website availability tests with Azure Application Insights here.
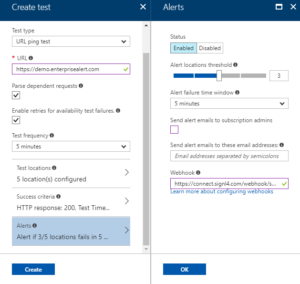
- Open Application Insights and click on Availability. Then choose ‘Add test’ on the displayed blade.
- Configure the test to ping your site in an appropriate interval and fine tune test locations and success criteria.
- The last part, the Alerts, is certainly the most important one, and opens a dedicated blade on click.
Your website availability test is now configured and any alerts are sent to your SIGNL4 team. In case you need to notify multiple SIGNL4 teams, call the webhook of a workflow service such as Microsoft Flow, Zapier or ITTT first and take it from there.
Explore alerting with SIGNL4
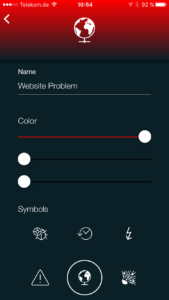
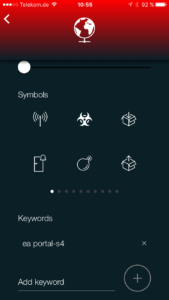
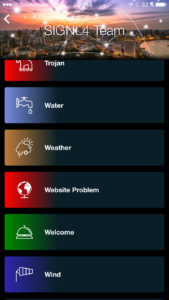
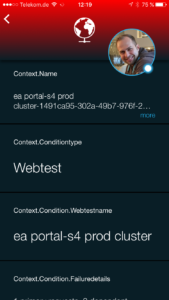
In SIGNL4, I have created a dedicated system category for my availability alerts (under ‘Gear Settings’ -> ‘Team’ -> ‘Services & Systems’). My category has a keyword to match it to my availability alerts from Application Insights. I chose the string <test name>-<azure ressource name> which is a good start. This results in my Application Insights alerts show up in the SIGNL4 app with a red color and the globe icon.
In case my monitored site becomes unresponsive, Application Insights will fire an alert which is sent to the SIGNL4 team. Team members checked in for duty are notified and can confirm the alert (simple tap on the encircled question mark). I’ve actually tested this alert notification flow by simply manipulating the site’s DNS records.
Metrics and smart detection
In this blog post I’ve setup SIGNL4 as notification channel for website availability monitoring with Azure Application Insights. However, availability tests are just one source for alerts in Application Insights. You can setup the same alert flow for your Metric alerts and for Application Insights’ Smart Detection capabilities:
- Availability tests: “Availability” -> “Add test”
- Smart Detection: “Smart Detection” -> “Settings” -> “Failure Anomalies”
- Metrics: “Alerts” -> “Add metric alert”
For each of these alert types, simply add your team’s dedicated SIGNL4 webhook in the configuration details as per my example above. Metric alerts also tie in with Azure Monitor, for which I have written another blog post here.
Get started with SIGNL4
To get started with SIGNL4, download the app, sign up with your email and you are good to go for 30 days trial.


